How to Replace Your Toro's Drive Belt: A Step-by-Step DIY Guide
Date Released: 1 Mar 2026 Category: Blog
There's a particular sense of satisfaction that comes with fixing something yourself rather than paying someone else to do it. Replacing a drive belt on your Toro mower is one of those jobs that looks intimidating but is actually quite manageable if you take it step by step. You don't need to be mechanically gifted, you just need a bit of patience and the willingness to get your hands dirty for an hour or so.
Drive belts are one of the most common parts that need replacing on ride-on mowers. They work hard, flexing thousands of times every time you mow, exposed to grass clippings, moisture, and heat. Eventually, they wear out. When that happens, you've got a choice: book it in for repair and wait, or have a go yourself and potentially save a fair bit of money.

Have a look underneath if you can safely do so. Sometimes you can actually see a broken belt hanging loose or notice that a belt that should be there simply isn't. If you're confident it's the belt, you're ready to proceed.
That last point is genuinely important. Take photographs at every stage, particularly of how the belt routes around the pulleys. When you're putting the new belt on, these photos will be invaluable. Trust me, what seems obvious when you're taking it apart becomes confusing when you're staring at a new belt and trying to remember which pulley it went around first.
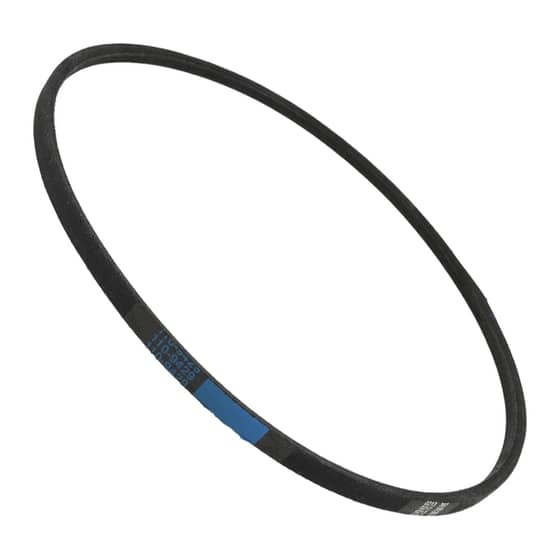
You'll also need the replacement belt itself, obviously. Make sure you've ordered the correct belt for your specific Toro model. Belts aren't universal, and using the wrong one means it either won't fit or won't work properly even if you do manage to get it on.

Make sure your Toro is on level ground and can't roll. Engage the parking brake if you have one. If you're working on the deck belt, you might need to tip the mower slightly or raise the deck to maximum height for access. Never get underneath a mower that's not properly supported.
Most Toro drive belts require removing a belt guard first. These are typically held on with a few bolts and are designed to come off relatively easily. Keep the bolts somewhere safe because they're easy to lose in the grass.
For deck belts, you might need to lower or remove the entire cutting deck. This sounds dramatic, but it's usually just a case of disconnecting a few pins or bolts that hold the deck to the mower. Your manual will show the specific process for your model.
To remove the belt, you'll usually need to release tension first. Many Toro models have a spring-loaded tensioner that you can push or pull to slack the belt. Some use a manual adjustment that you'll need to loosen. Work out which system your model uses before you start tugging on things.
With tension released, you can work the belt off the pulleys one at a time. Start with the easiest one to access and work your way around. Sometimes you need to rotate pulleys to help the belt slide off. The old belt might be tight even with tension released, so don't be afraid to wiggle and work it gently.
Work slowly and check each pulley as you go. It's incredibly easy to miss one pulley or route the belt on the wrong side of something. Double-check against your photos constantly. If it doesn't look right, it probably isn't.
Pay special attention to any idler pulleys. These often guide the belt or maintain tension, and missing one or routing incorrectly around it means the belt won't work even if everything else is perfect.
Correct tension is crucial. Too loose and the belt slips, too tight and you put excessive load on bearings and the belt itself. If your manual specifies a deflection measurement, use it. This typically means pressing on the belt at its longest run and measuring how much it moves.
Before you button everything back up, rotate the pulleys by hand to make sure the belt tracks properly and nothing binds or catches. Everything should turn smoothly without resistance.
Double-check that everything is secure and that you haven't left any tools or loose bolts anywhere they shouldn't be. It's surprisingly easy to leave a spanner sitting on the deck.
If you've replaced a deck belt, engage the blades. Again, listen for smooth engagement without noise. If everything sounds good, try a short test drive or test cut. Keep it brief initially, just enough to confirm everything works properly.

Sometimes despite your best efforts, something just isn't right. There's no shame in calling a professional at this point. You've likely learned something useful, and a mechanic can spot what you've missed much faster than you could work it out by trial and error.
Belt replacement is an excellent introduction to mower maintenance because it teaches you how components fit together without requiring any special tools or skills. Take your time, follow the process, and you'll likely surprise yourself with what you can accomplish.
Drive belts are one of the most common parts that need replacing on ride-on mowers. They work hard, flexing thousands of times every time you mow, exposed to grass clippings, moisture, and heat. Eventually, they wear out. When that happens, you've got a choice: book it in for repair and wait, or have a go yourself and potentially save a fair bit of money.
Before You Start: Is This Actually a Belt Problem?
First things first, make sure you're actually dealing with a belt issue. If your Toro won't move when you engage the drive, or if the blades won't spin when you pull the engagement lever, a worn or broken belt is the likely culprit. You might also notice squealing noises, burning smells, or the mower losing power under load.Have a look underneath if you can safely do so. Sometimes you can actually see a broken belt hanging loose or notice that a belt that should be there simply isn't. If you're confident it's the belt, you're ready to proceed.
What You'll Need
The good news is that you don't need a workshop full of expensive tools. A basic toolkit should cover it. You'll want a socket set or spanners in various sizes, some screwdrivers, possibly a pair of pliers, and definitely a camera phone to take photos as you go.That last point is genuinely important. Take photographs at every stage, particularly of how the belt routes around the pulleys. When you're putting the new belt on, these photos will be invaluable. Trust me, what seems obvious when you're taking it apart becomes confusing when you're staring at a new belt and trying to remember which pulley it went around first.
You'll also need the replacement belt itself, obviously. Make sure you've ordered the correct belt for your specific Toro model. Belts aren't universal, and using the wrong one means it either won't fit or won't work properly even if you do manage to get it on.
Safety Absolutely Comes First
Before you touch anything, disconnect the spark plug lead. This is absolutely essential. You're going to be working around blades and moving parts, and the last thing you want is the engine accidentally starting. Pull the spark plug lead off and tuck it somewhere it can't accidentally reconnect.Make sure your Toro is on level ground and can't roll. Engage the parking brake if you have one. If you're working on the deck belt, you might need to tip the mower slightly or raise the deck to maximum height for access. Never get underneath a mower that's not properly supported.
Getting to the Belt
The exact process varies depending on which belt you're replacing and which Toro model you have, but the general principle is the same. You need to access the belt, which usually means removing guards, covers, or sometimes the entire deck if it's a deck drive belt.Most Toro drive belts require removing a belt guard first. These are typically held on with a few bolts and are designed to come off relatively easily. Keep the bolts somewhere safe because they're easy to lose in the grass.
For deck belts, you might need to lower or remove the entire cutting deck. This sounds dramatic, but it's usually just a case of disconnecting a few pins or bolts that hold the deck to the mower. Your manual will show the specific process for your model.
Removing the Old Belt
Once you can actually see the belt, take those photographs we mentioned. Get shots from multiple angles showing how it routes around every pulley. Pay particular attention to any idler pulleys or tensioners because these are easy to get wrong when reassembling.To remove the belt, you'll usually need to release tension first. Many Toro models have a spring-loaded tensioner that you can push or pull to slack the belt. Some use a manual adjustment that you'll need to loosen. Work out which system your model uses before you start tugging on things.
With tension released, you can work the belt off the pulleys one at a time. Start with the easiest one to access and work your way around. Sometimes you need to rotate pulleys to help the belt slide off. The old belt might be tight even with tension released, so don't be afraid to wiggle and work it gently.
Fitting the New Belt
Here's where those photographs earn their keep. Starting from the same pulley where you began removal, route the new belt following the same path as the old one. The belt needs to sit in the grooves of every pulley properly, not riding up on the edges or sitting twisted.Work slowly and check each pulley as you go. It's incredibly easy to miss one pulley or route the belt on the wrong side of something. Double-check against your photos constantly. If it doesn't look right, it probably isn't.
Pay special attention to any idler pulleys. These often guide the belt or maintain tension, and missing one or routing incorrectly around it means the belt won't work even if everything else is perfect.
Tensioning and Testing
Once the belt is routed correctly, you need to restore tension. If you have a spring-loaded tensioner, this often happens automatically when you release whatever you were holding to slack the belt. For manual tensioners, adjust according to your manual's specifications.Correct tension is crucial. Too loose and the belt slips, too tight and you put excessive load on bearings and the belt itself. If your manual specifies a deflection measurement, use it. This typically means pressing on the belt at its longest run and measuring how much it moves.
Before you button everything back up, rotate the pulleys by hand to make sure the belt tracks properly and nothing binds or catches. Everything should turn smoothly without resistance.
Putting It All Back Together
Refit any guards or covers you removed, making sure bolts are properly tightened. If you removed the deck, reconnect it following the reverse of how you took it off. Again, photos are your friend here.Double-check that everything is secure and that you haven't left any tools or loose bolts anywhere they shouldn't be. It's surprisingly easy to leave a spanner sitting on the deck.
The Test Run
Reconnect the spark plug lead. Start your Toro and let it idle for a moment, listening for any unusual noises. With the blades disengaged, try engaging the drive. It should engage smoothly without squealing or slipping.If you've replaced a deck belt, engage the blades. Again, listen for smooth engagement without noise. If everything sounds good, try a short test drive or test cut. Keep it brief initially, just enough to confirm everything works properly.
When Things Don't Go to Plan
If the belt won't fit, double-check you've ordered the correct one. If it fits but slips immediately, check your tension adjustment. If it makes horrible noises, stop immediately and check your routing against those photos.Sometimes despite your best efforts, something just isn't right. There's no shame in calling a professional at this point. You've likely learned something useful, and a mechanic can spot what you've missed much faster than you could work it out by trial and error.
The Satisfaction of DIY
When it works, and it usually does if you're careful and methodical, there's genuine satisfaction in knowing you've fixed your own mower. You've saved money, learned something new, and gained confidence for tackling other repairs in future.Belt replacement is an excellent introduction to mower maintenance because it teaches you how components fit together without requiring any special tools or skills. Take your time, follow the process, and you'll likely surprise yourself with what you can accomplish.