Scalping vs. Precision: How to Level Your Mower Deck for the Perfect "British Manor" Finish
Date Released: 2 Apr 2026 Category: Blog
There is a particular kind of pride that comes with a freshly mown lawn. When the sun hits the grass just right, and those crisp, even lines stretch across your garden, it’s a wonderful sight. However, nothing ruins that "British Manor" aesthetic faster than an uneven cut.
If you’ve noticed that your Toro is leaving a "stepped" look in the grass, or perhaps it’s "scalping" (cutting far too low) on one side while leaving the other side long, your mower deck is likely out of alignment.
Many owners assume that once a deck is fitted, it stays level forever. In reality, the vibrations of mowing, bumping over kerbs, or even the natural stretching of lift cables can cause the deck to tilt. The good news? You don't need a degree in engineering to fix it. With a few simple tools and a bit of patience, you can recalibrate your Toro for a precision finish.
Furthermore, a tilted deck puts uneven strain on your mower blades and drive belts. If the deck is pitched incorrectly, the blades have to work harder to discharge grass, which can lead to clogging and premature wear on your pulleys. Leveling your deck isn't just about vanity; it’s about mechanical efficiency.

Flat Ground is Key: You cannot level a deck on a gravel driveway or a bumpy lawn. You need a perfectly flat, concrete or tarmac surface. Check Your Tyres: This is the most common mistake! If one tyre has lower pressure than the others, the whole tractor will lean, making the deck appear unlevel. Ensure all four tyres are inflated to the exact pressures listed in your Toro manual before you touch the deck. Safety First: Ensure the engine is off, the parking brake is engaged, and the spark plug wire is disconnected so there is zero chance of the blades turning while you are measuring.
A tape measure (or a specialised mower deck levelling gauge) A pair of sturdy work gloves A set of spanners (usually 13mm to 19mm for most Toro models) A block of wood (optional, to help hold the blade in place)
Position the Blades: Reach under the deck (with gloves on!) and turn the blades so they are pointing out toward the sides of the mower (perpendicular to the direction of travel). Measure the Tips: Measure the distance from the outside tip of the left blade to the ground. Then, do the same on the right side. The Goal: Both sides should be within 3mm (1/8 inch) of each other. Adjusting: Look for the "lift links" or "adjustment nuts" on the side of the mower deck. By tightening the nut, you raise that side of the deck; by loosening it, you lower it. Make small adjustments, usually one or two full turns, and then re-measure.
Position the Blades: Turn the blades so they are pointing straight ahead (parallel to the direction of travel). Measure: Measure the front tip of the blade to the ground, and then the rear tip of the same blade to the ground. The Goal: The front tip should be roughly 3mm to 6mm (1/8 to 1/4 inch) lower than the rear tip. This ensures the blade only cuts the grass once at the front, rather than "re-cutting" it at the back, which wastes power and shreds the grass tips. Adjusting: Most Toro tractors have a "front adjustment nut" located near the front axle. Tightening this will usually pull the front of the deck up.
Bent Lift Links: These are the rods that hold the deck up. If you've ever "bottomed out" the deck on a hidden stump or a kerb, these links can bend. A bent link will never hold a steady adjustment. Worn Shoulder Bolts and Bushings: The pivot points where the deck attaches to the tractor can wear down. If there is "play" or wobbling in the mounting hardware, the deck will bounce around regardless of how much you level it. Damaged Hanger Brackets: Check the brackets welded to the deck itself. If they are cracked or rusted through, the deck will sag.
If you spot any of these issues, it’s best to replace the hardware. Browsing the Chassis and Deck section at Toro Tractor Spares will help you find the exact pins, bolts, and links for your specific model.
Avoid the "Bumps": Try to avoid hitting the edges of flower beds or paving stones with the side of the mower deck. Even a small impact can nudge the adjustment nuts out of place. Clear the Debris: After mowing, ensure there isn't a massive buildup of dried grass on top of the deck. This extra weight can occasionally cause the deck to sit slightly off-centre. Spring Check-up: Make deck levelling a part of your annual spring routine. Just as you'd check the oil, a quick five-minute measurement will ensure you aren't fighting your mower all summer.
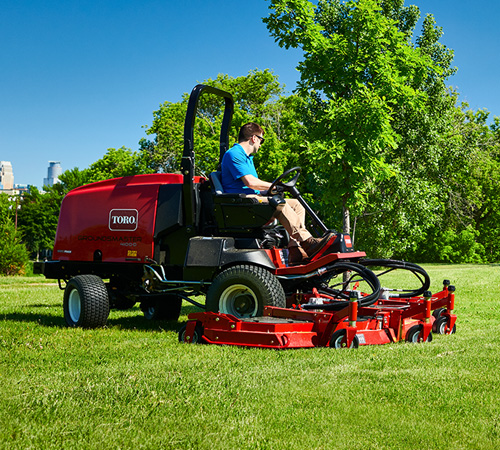
If your deck hardware is looking a bit tired or your adjustment nuts are seized with rust, don't struggle with them. A few fresh genuine parts can make the levelling process much smoother and keep your machine cutting straight for years to come.
If you’ve noticed that your Toro is leaving a "stepped" look in the grass, or perhaps it’s "scalping" (cutting far too low) on one side while leaving the other side long, your mower deck is likely out of alignment.
Many owners assume that once a deck is fitted, it stays level forever. In reality, the vibrations of mowing, bumping over kerbs, or even the natural stretching of lift cables can cause the deck to tilt. The good news? You don't need a degree in engineering to fix it. With a few simple tools and a bit of patience, you can recalibrate your Toro for a precision finish.
Why a Level Deck is Essential for Lawn Health
Beyond the way it looks, an unlevel deck is actually bad for your grass. When one side of the mower sits lower than the other, it can cut the grass blade too close to the root. This "scalping" weakens the plant, making it more susceptible to moss, weeds, and disease, especially during the damp UK spring.Furthermore, a tilted deck puts uneven strain on your mower blades and drive belts. If the deck is pitched incorrectly, the blades have to work harder to discharge grass, which can lead to clogging and premature wear on your pulleys. Leveling your deck isn't just about vanity; it’s about mechanical efficiency.
Before You Begin: The Safety Check
Before we reach for the spanners, we need to ensure the environment is safe and the machine is prepared:The Tools You’ll Need
You don’t need a professional workshop to do this. A basic toolkit will suffice:Step 1: Side-to-Side Leveling
The first goal is to make sure the left side of the deck is at the exact same height as the right side.Step 2: Front-to-Back Pitch (The "Secret" to a Clean Cut)
Most people think a deck should be perfectly flat from front to back, but that’s actually a myth. For the best cut and most efficient grass discharge, the front of the deck should be slightly lower than the back.When Adjusting Isn't Enough: What to Look For
If you find yourself turning the adjustment nuts but the deck simply won't level, or if it falls out of alignment after just one mow, you likely have a mechanical part that has reached the end of its life.If you spot any of these issues, it’s best to replace the hardware. Browsing the Chassis and Deck section at Toro Tractor Spares will help you find the exact pins, bolts, and links for your specific model.
Tips for Maintaining that Perfect Finish
Now that your deck is level, how do you keep it that way?Conclusion
Achieving that "British Manor" look doesn't require a brand-new machine; it just requires a bit of precision. By taking the time to level your deck and ensure your blades are pitched correctly, you’ll find that your Toro mows faster, uses less fuel, and leaves your lawn looking healthier than ever.If your deck hardware is looking a bit tired or your adjustment nuts are seized with rust, don't struggle with them. A few fresh genuine parts can make the levelling process much smoother and keep your machine cutting straight for years to come.